Exploring the mobile app
The RevasOS mobile app is your pocket companion for time tracking and attendance. Available on iOS and Android, it gives you quick access to timesheets, calendars, hour reports, and — most importantly — lets you clock in and out of workplaces by scanning a QR code or tapping an NFC tag.
This guide walks you through every screen of the mobile app so you know what to expect the first time you open it.
Before you begin:
You need to have the RevasOS mobile app installed on your device. If you haven't done that yet, follow the install the smartphone app quickstart.
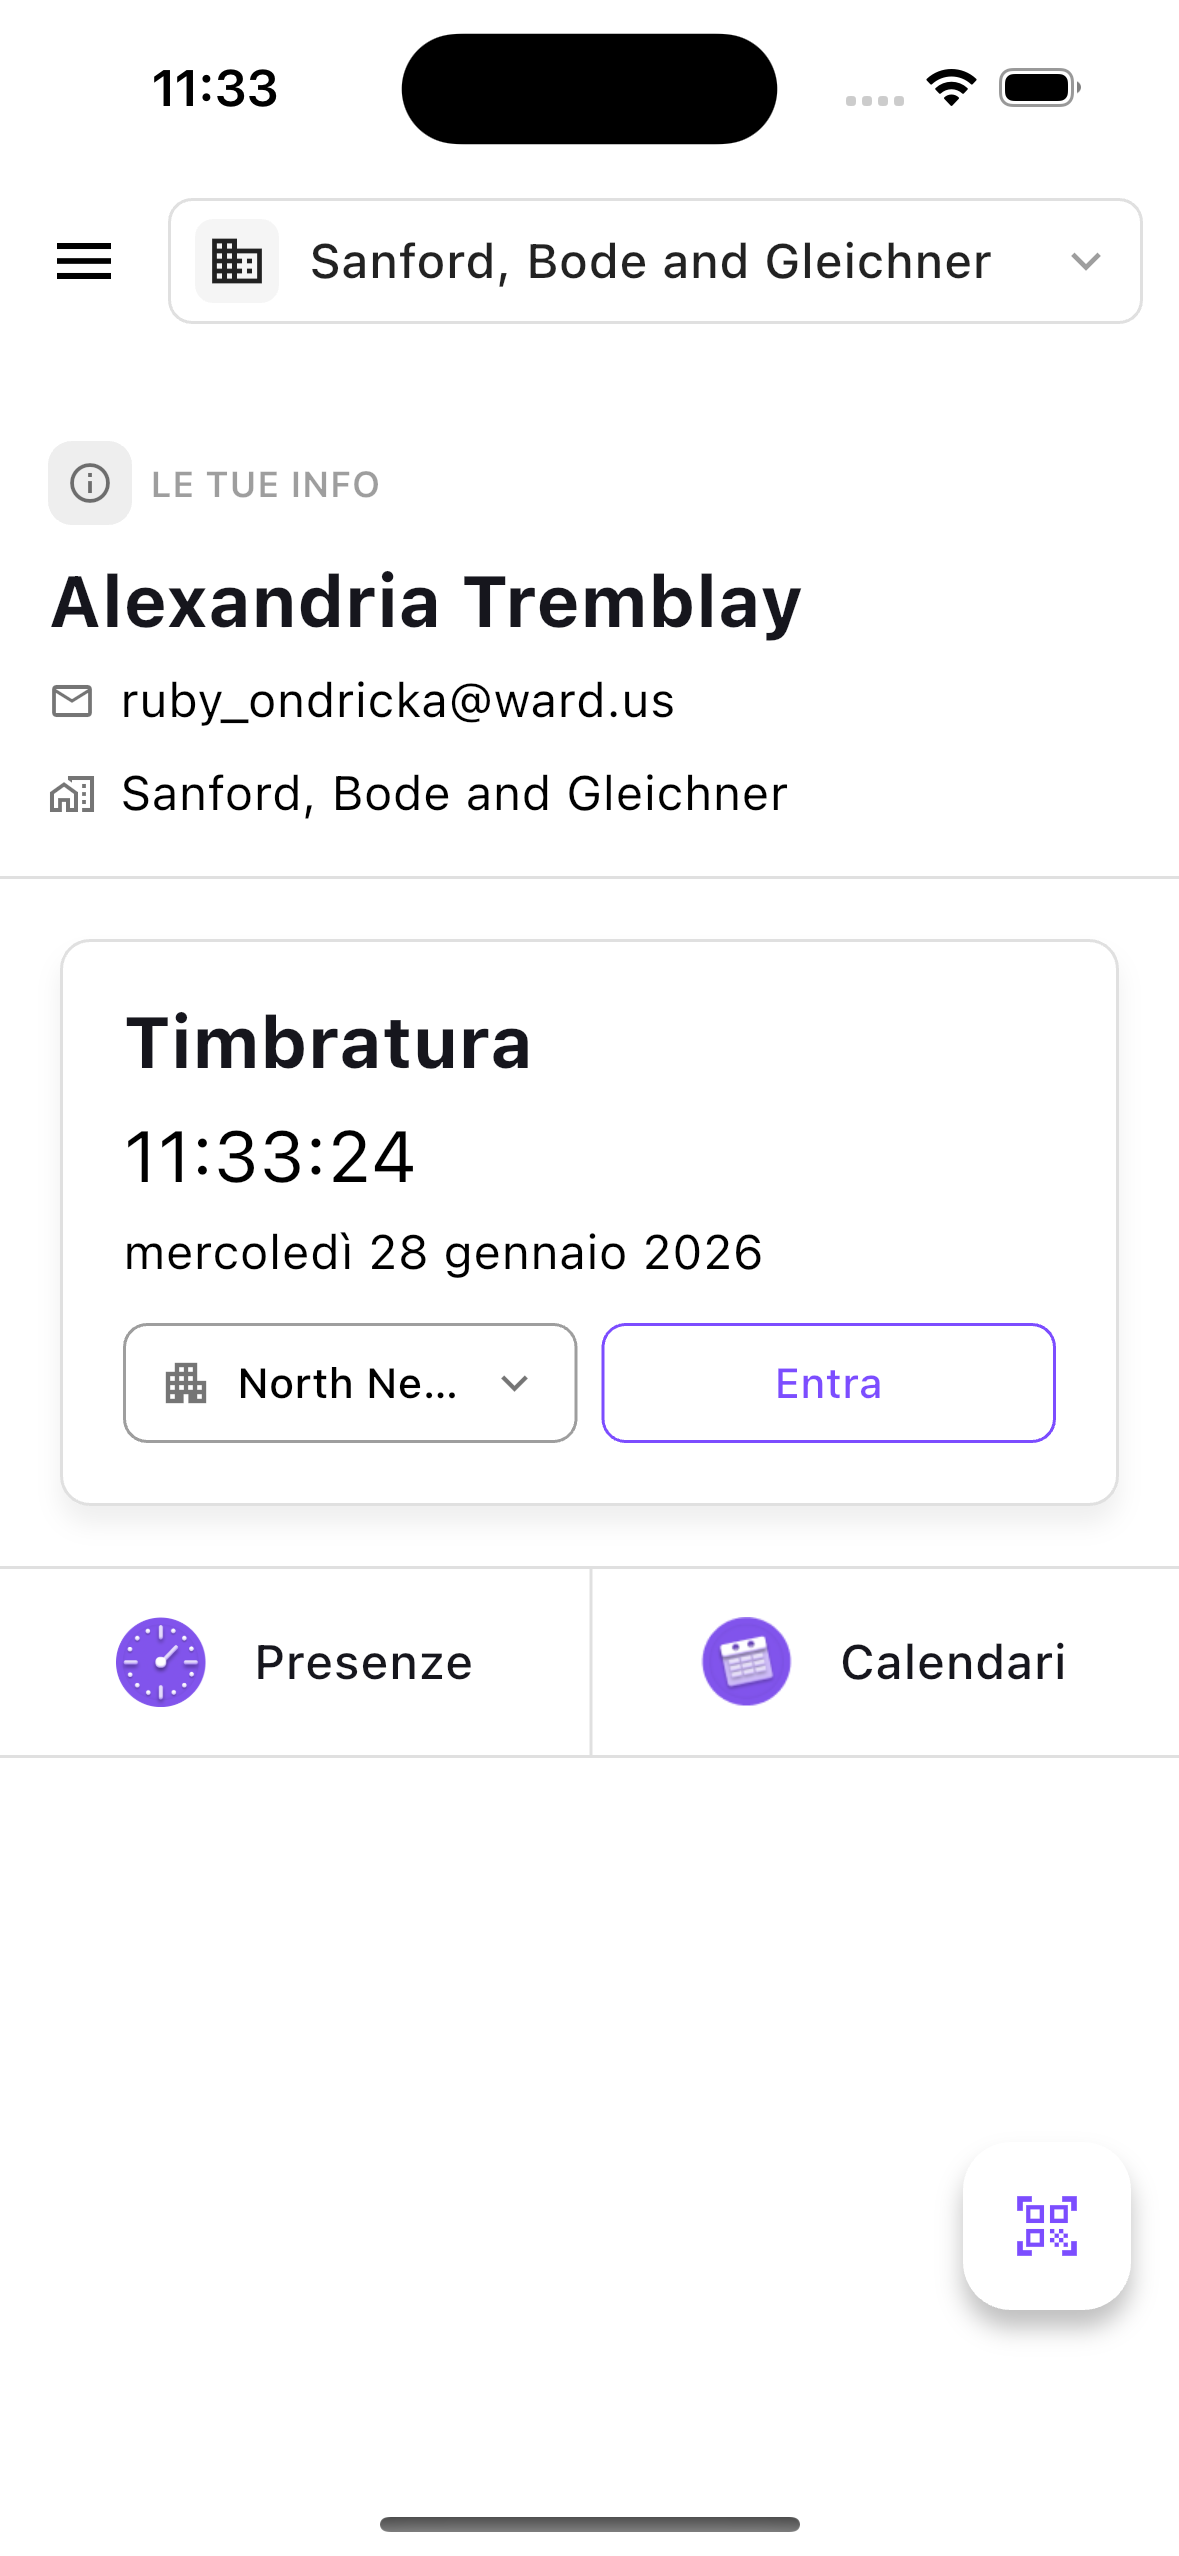
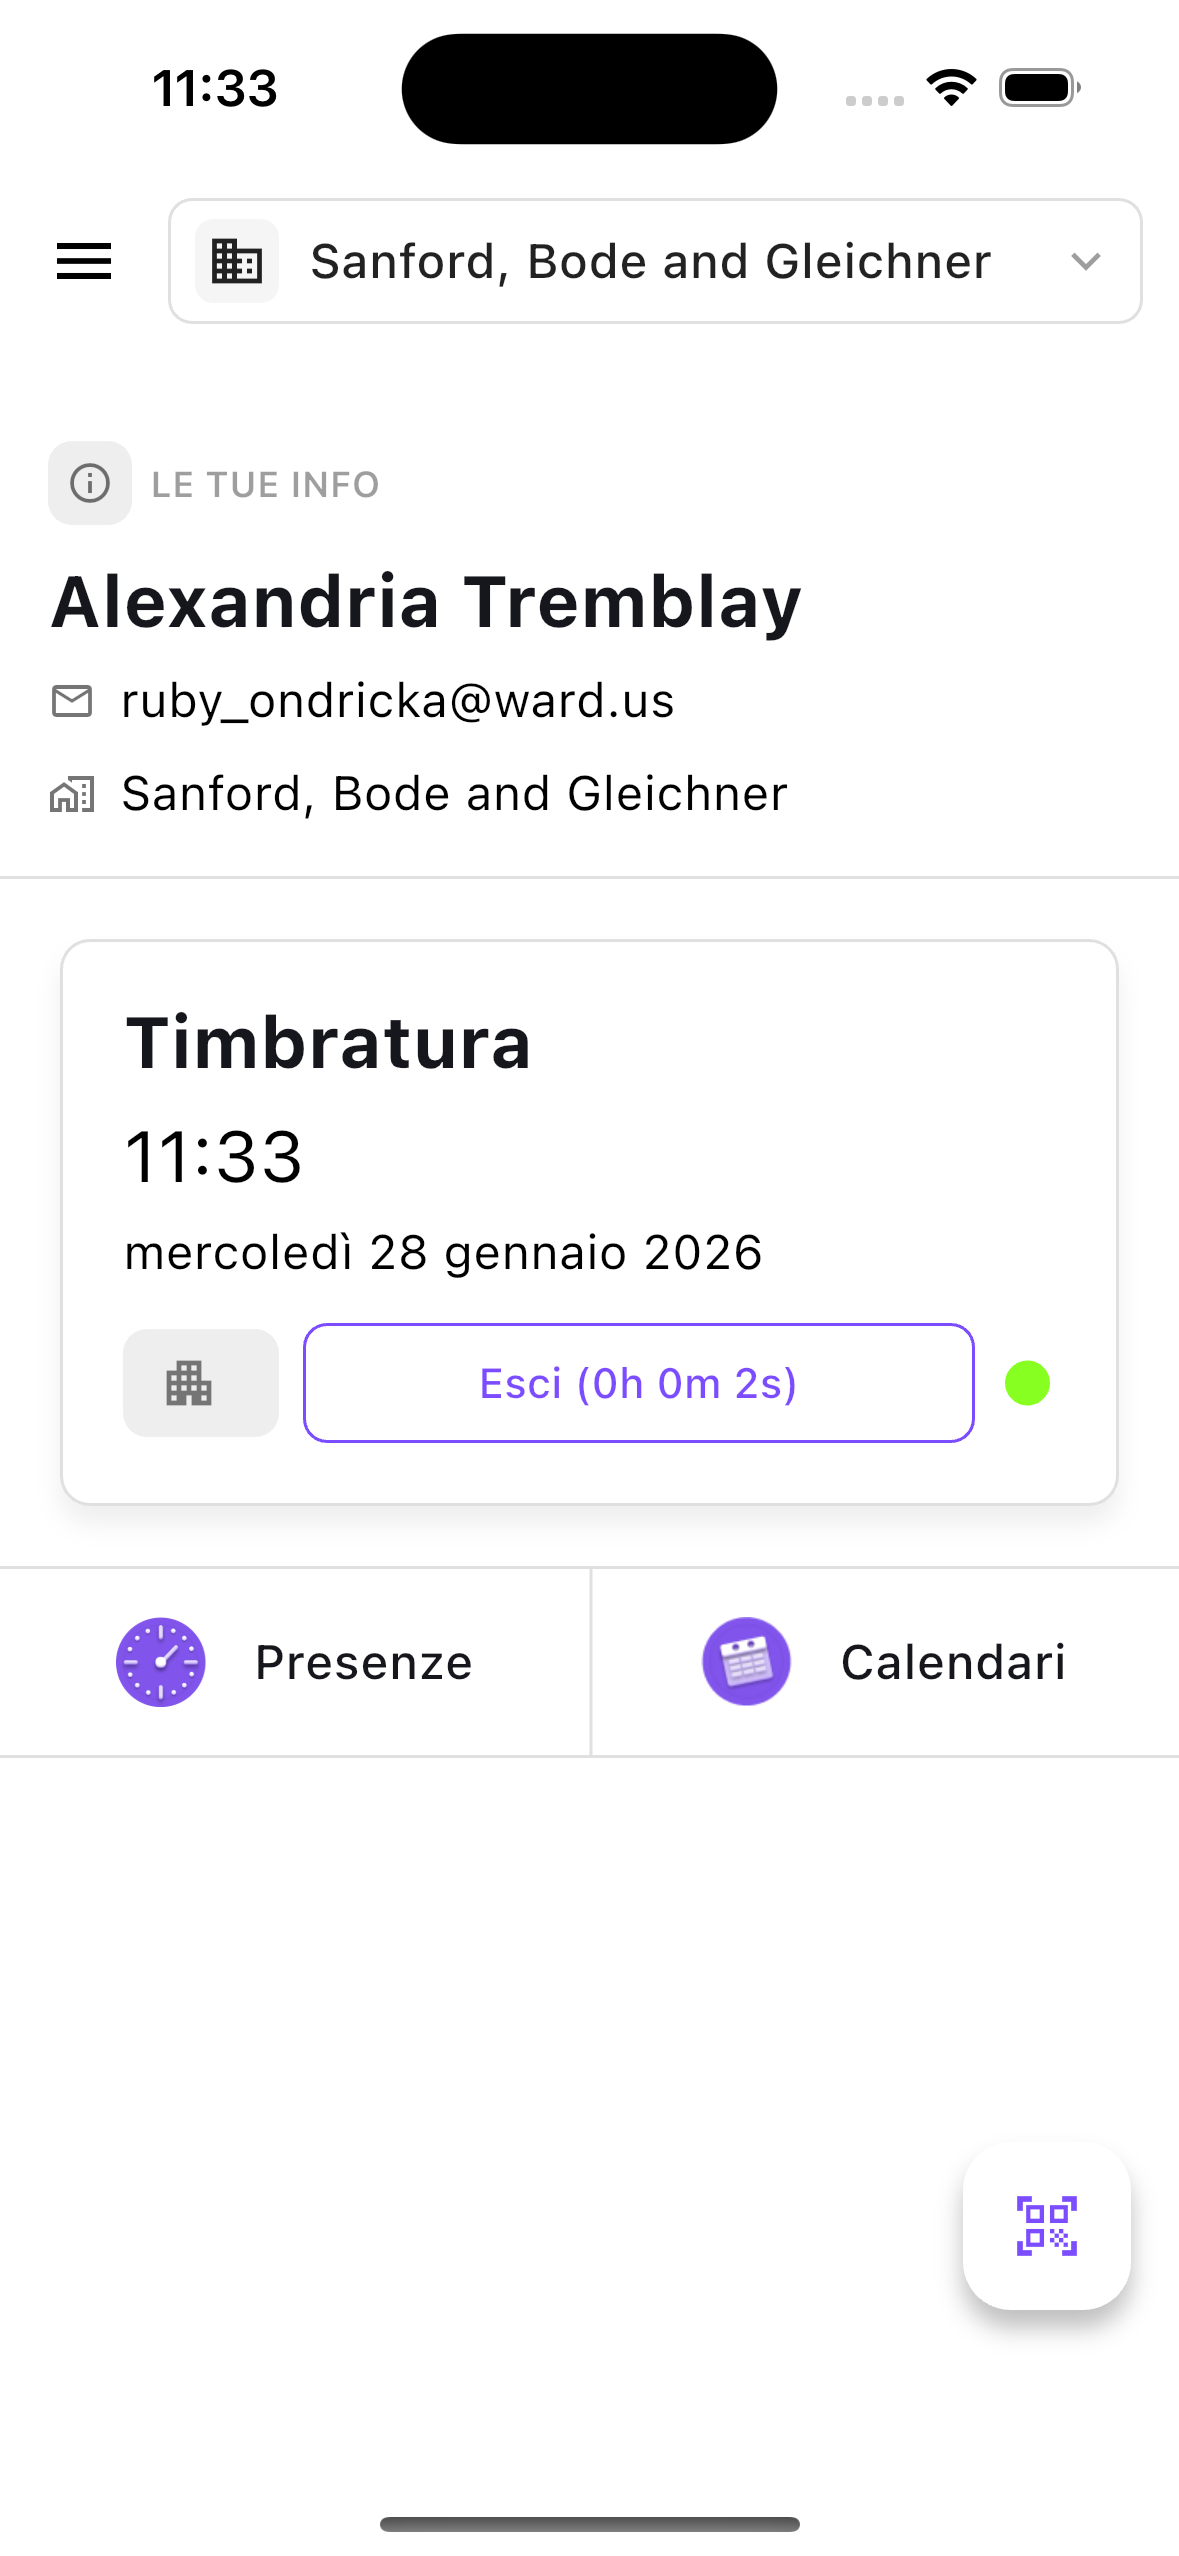
Home
The Home screen is your starting point every time you open the app. It tells you where you stand right now and gives you fast paths to everything else.
What you will find
- Clock-in status — a prominent card at the top shows whether you are currently clocked in or not. If you are clocked in, it tells you since when and at which workplace.
- Quick-action tiles — tap to jump straight to Timesheets or Calendars without navigating menus.
- Floating action buttons — two buttons always visible at the bottom of the screen let you instantly open the QR scanner or the NFC reader to clock in or out.
- Organization context — the name of your current organization is displayed so you always know which company you are working under.
TIP
If you belong to more than one organization, you can switch between them directly from the Home screen. See Organization switcher below.
Clock-in with QR code and NFC
The fastest way to record your attendance is by scanning a QR code or tapping an NFC tag placed at your workplace. This is the core of the mobile experience.
What you will find
- QR scanner — a camera-based scanner that reads the QR code posted at your workplace entrance. Point your phone at the code and the app does the rest.
- NFC reader — if your device supports NFC, simply hold your phone near the NFC tag at the workplace. The app picks it up automatically.
- Automatic direction detection — the system knows whether you are clocking in or out based on your current status. You don't need to choose.
- Break recording — when you clock out, the app may ask you to record your break duration so your net working time is accurate.
- Confirmation screen — after scanning, a clear success or failure message tells you immediately whether the clock-in or clock-out was registered.
Note:
QR codes and NFC tags are tied to a specific workplace and organization. If the tag belongs to a different organization than the one you currently have selected, the app will automatically switch you to the correct organization.
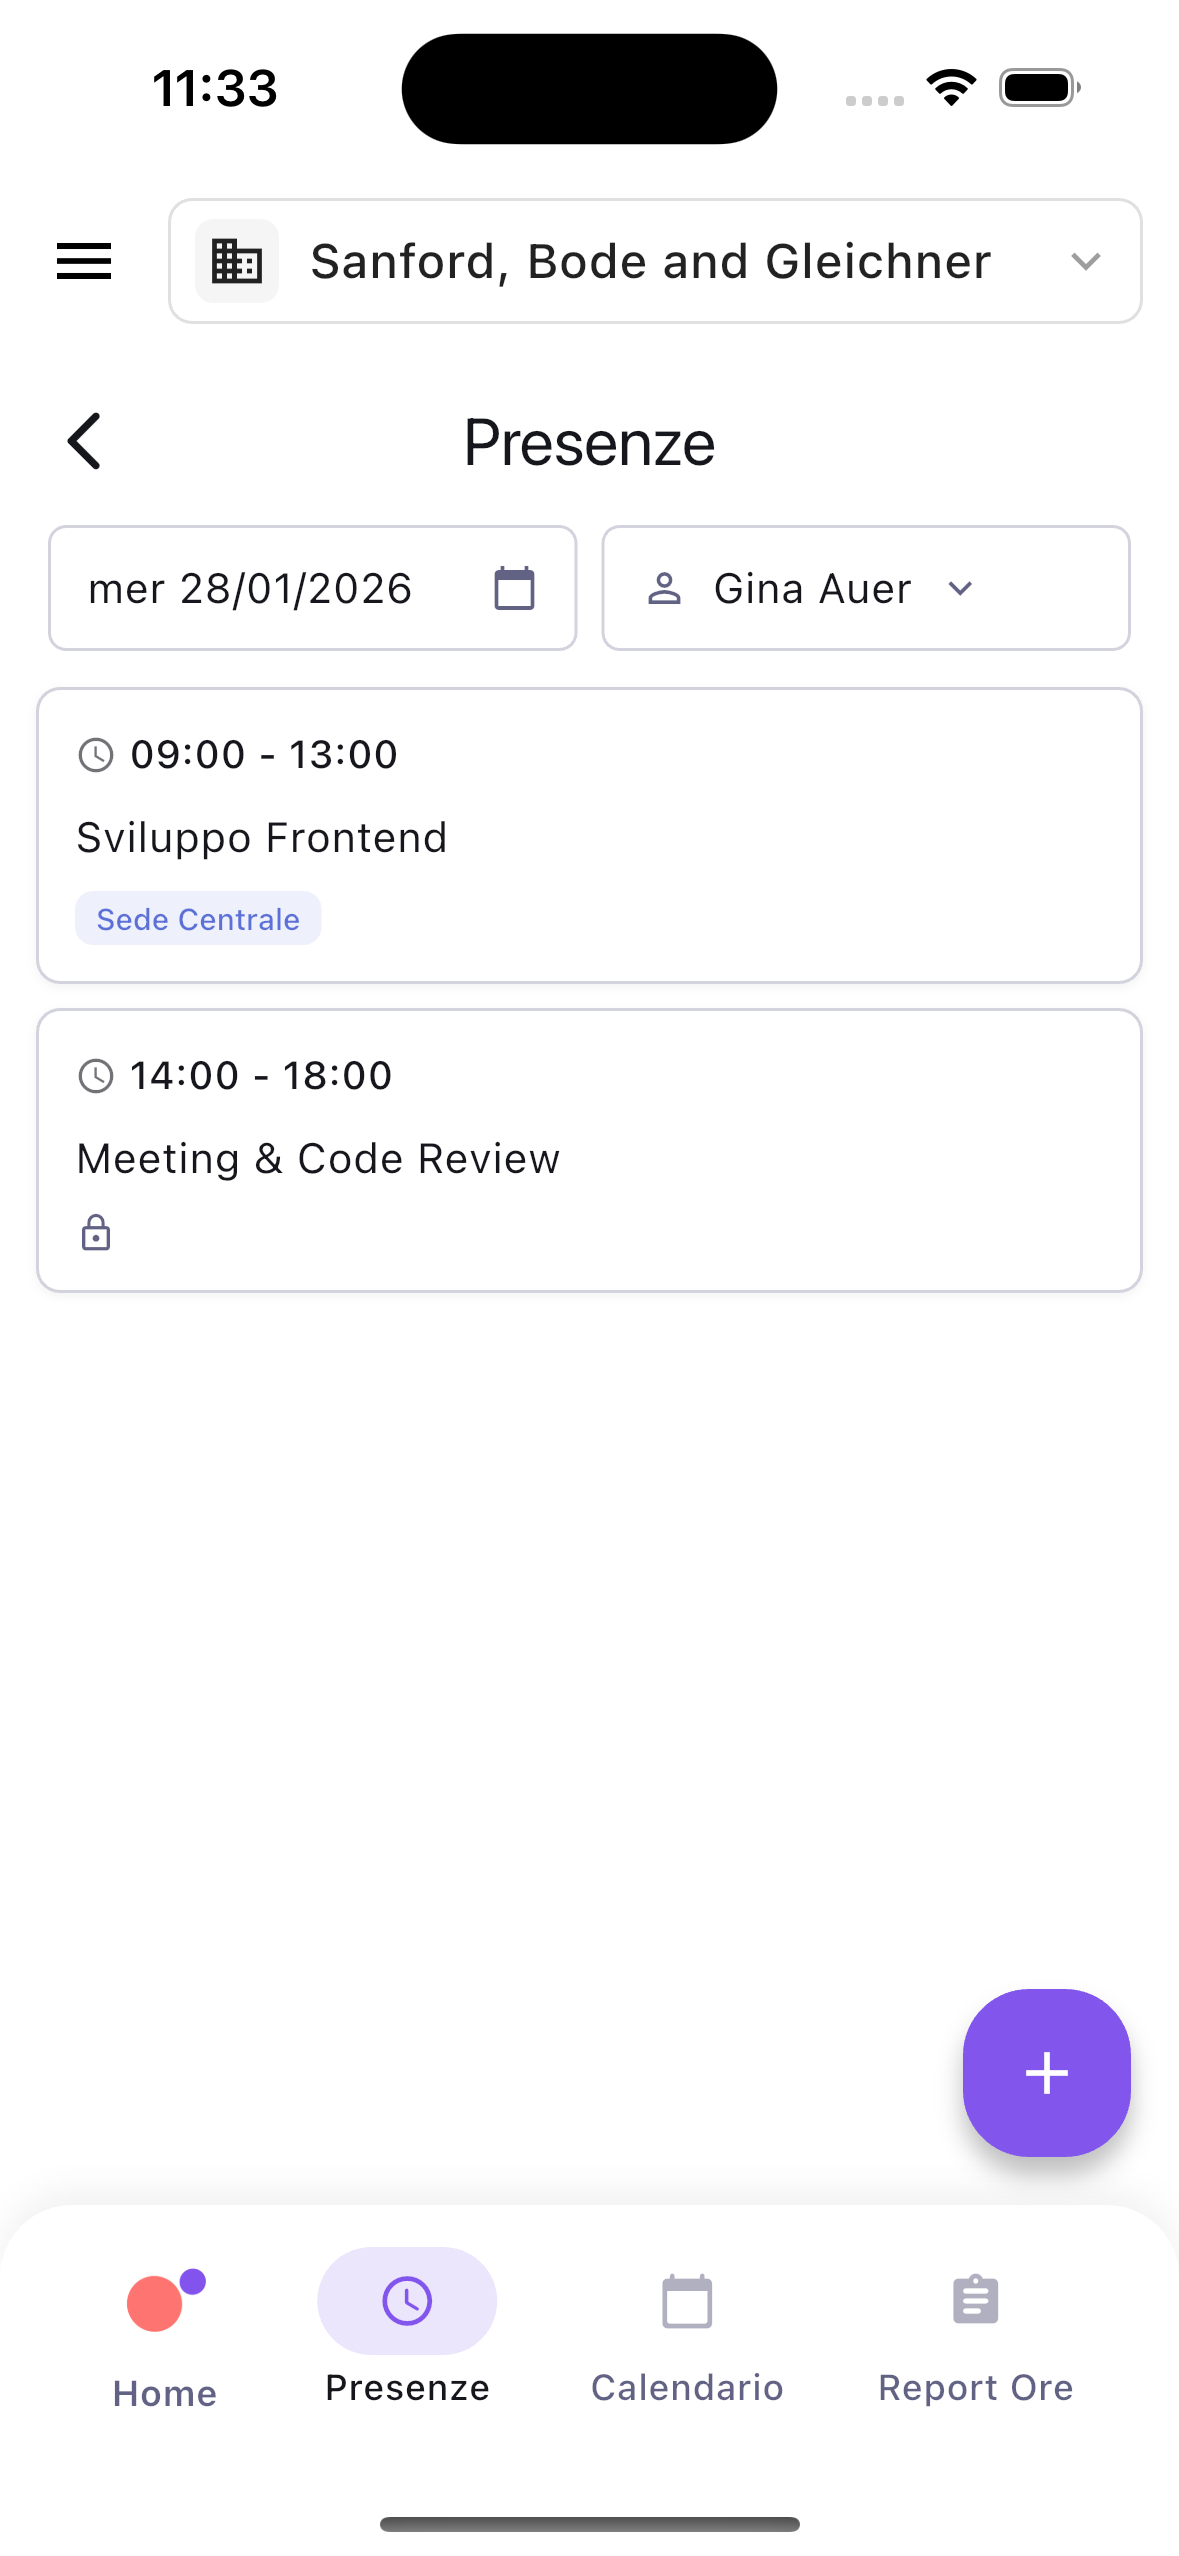
Timesheets
The Timesheets screen is where you see and manage all your time entries — presences, absences, and hours.
What you will find
- Time entries list — a chronological list of all your entries for the selected period. Each entry shows its description, start and end time, duration, and whether it is a presence, absence, or hour.
- Date navigation — browse entries by day using arrows or by selecting a specific date. The list updates to show only the entries for that period.
- Entry details — tap any entry to see its full details: description, times, workplace or leave type, linked task, and labels.
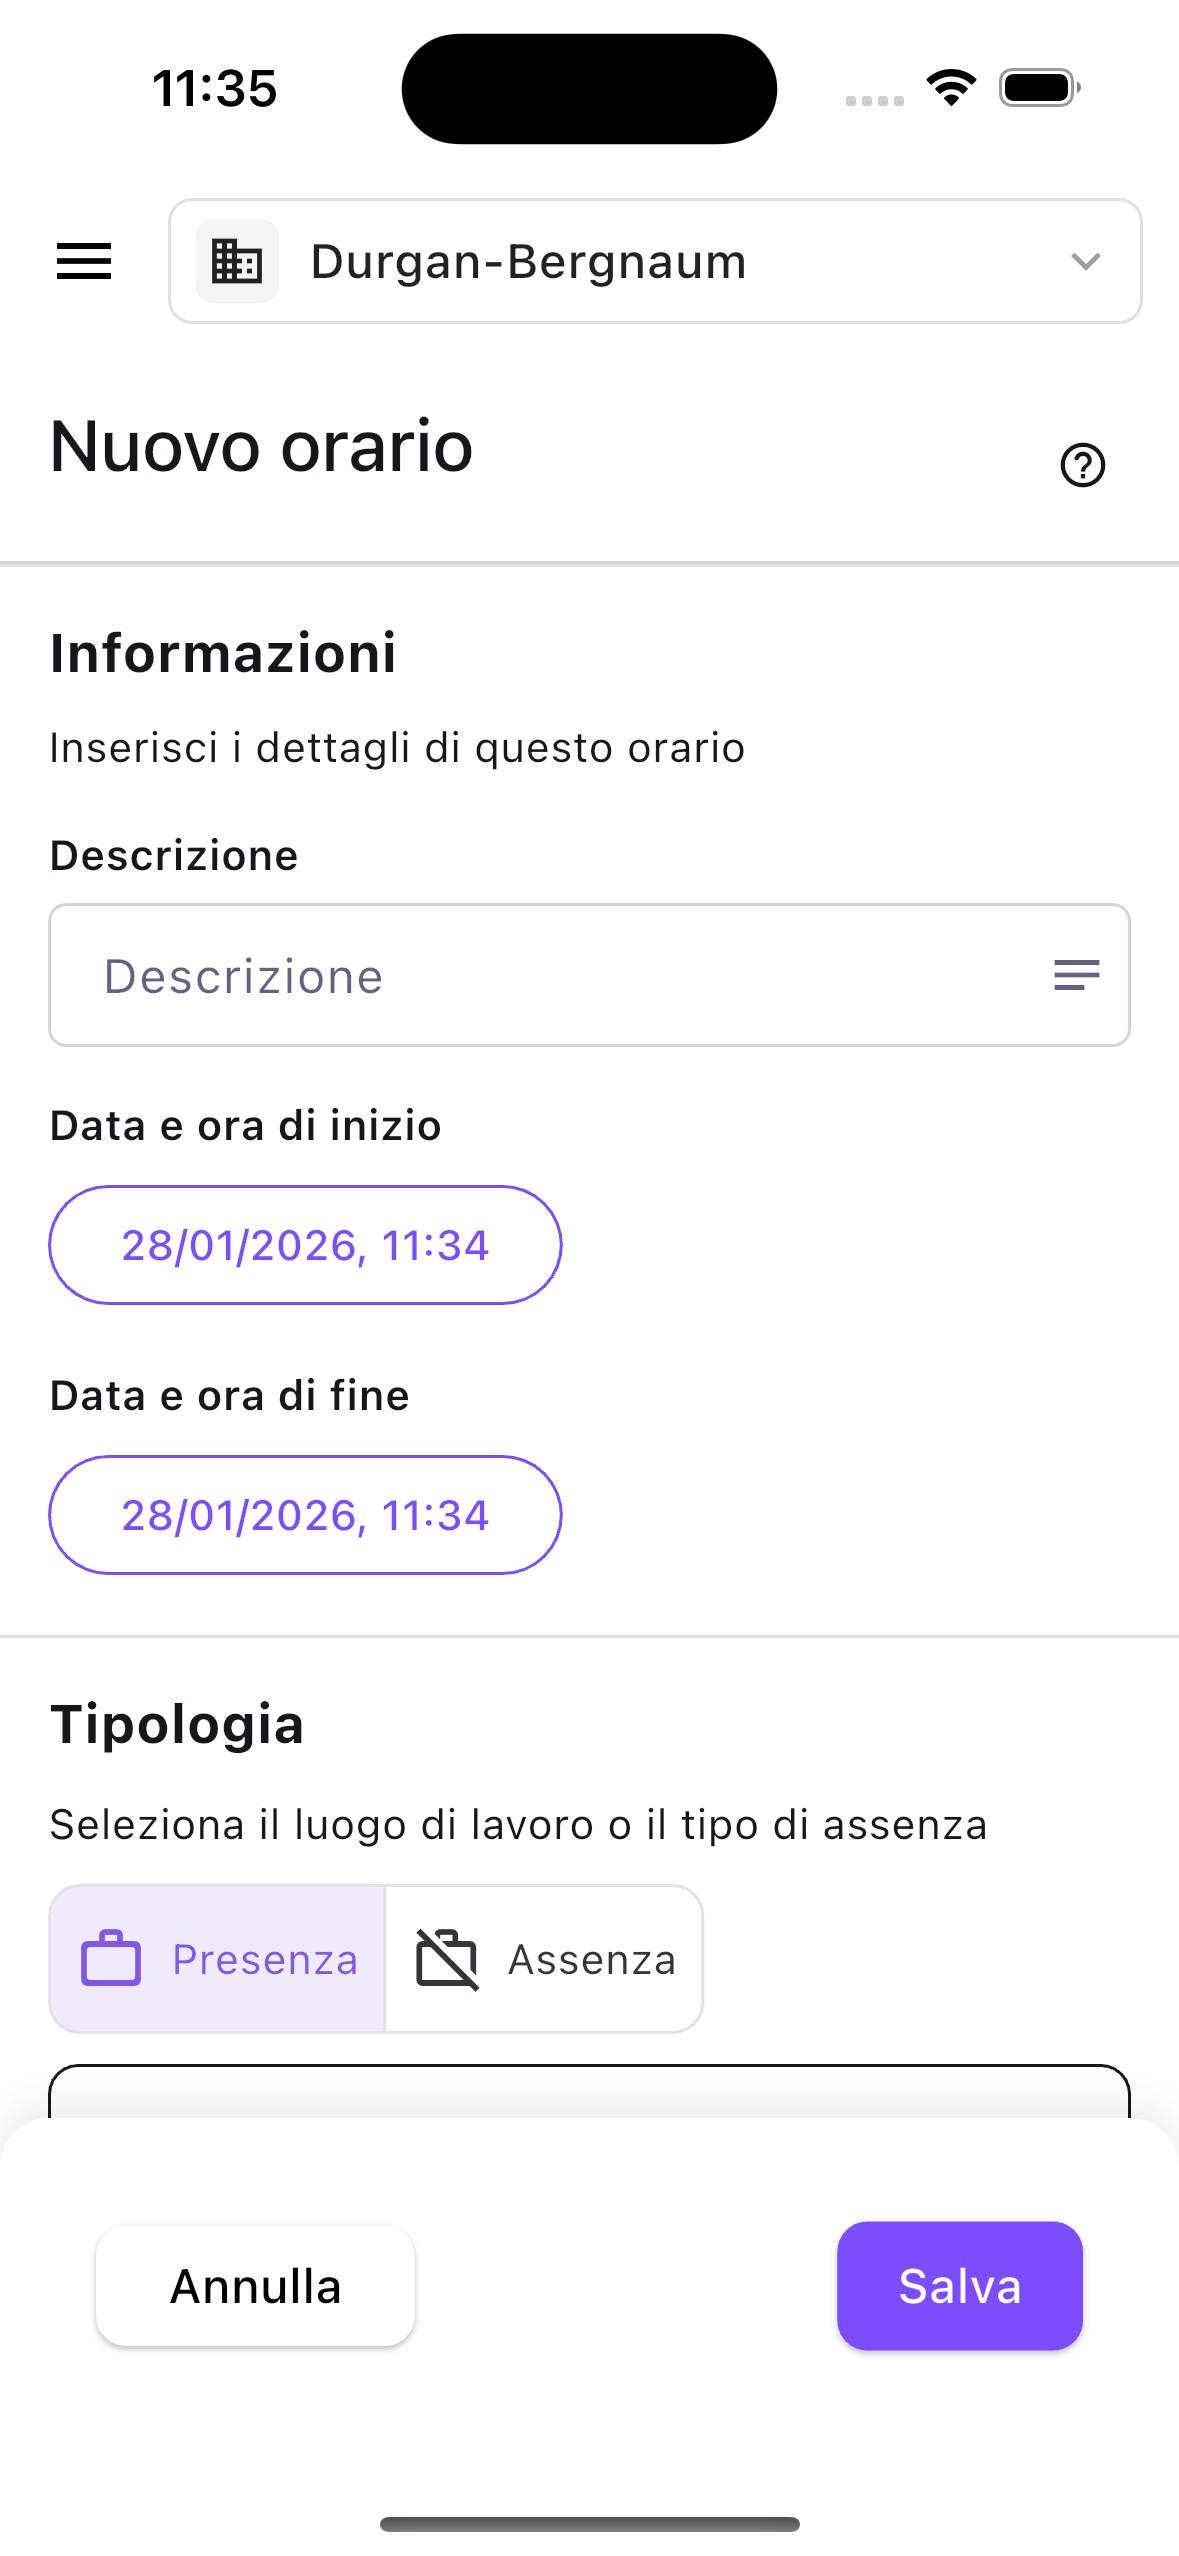
What you can do
- Create a new entry — tap the add button to log a new presence (with workplace), absence (with leave type), or hour.
- Edit an entry — tap an existing entry to open it and modify its times, description, type, or task assignment.
- Delete an entry — remove an entry you no longer need.
- Link a task — associate an entry with a project task so your time is tracked for project reporting.
Quick entry creation
A rapid-entry mode lets you fill an entire day's work in one screen:
- Select a date.
- Assign hours to one or more workplaces (for presences).
- Assign hours to one or more leave profiles (for absences — sick leave, vacation, personal time, and so on).
- Submit all entries at once.
This is especially useful if you work at multiple sites during the day or need to log a mix of presence and absence for the same date.

Splitting a time entry
If a single block of work spanned multiple projects, you can split it:
- Open the entry you want to split.
- Allocate portions of the total duration to different tasks.
- The app checks that all time is accounted for.
- Confirm, and individual task-linked entries are created automatically.
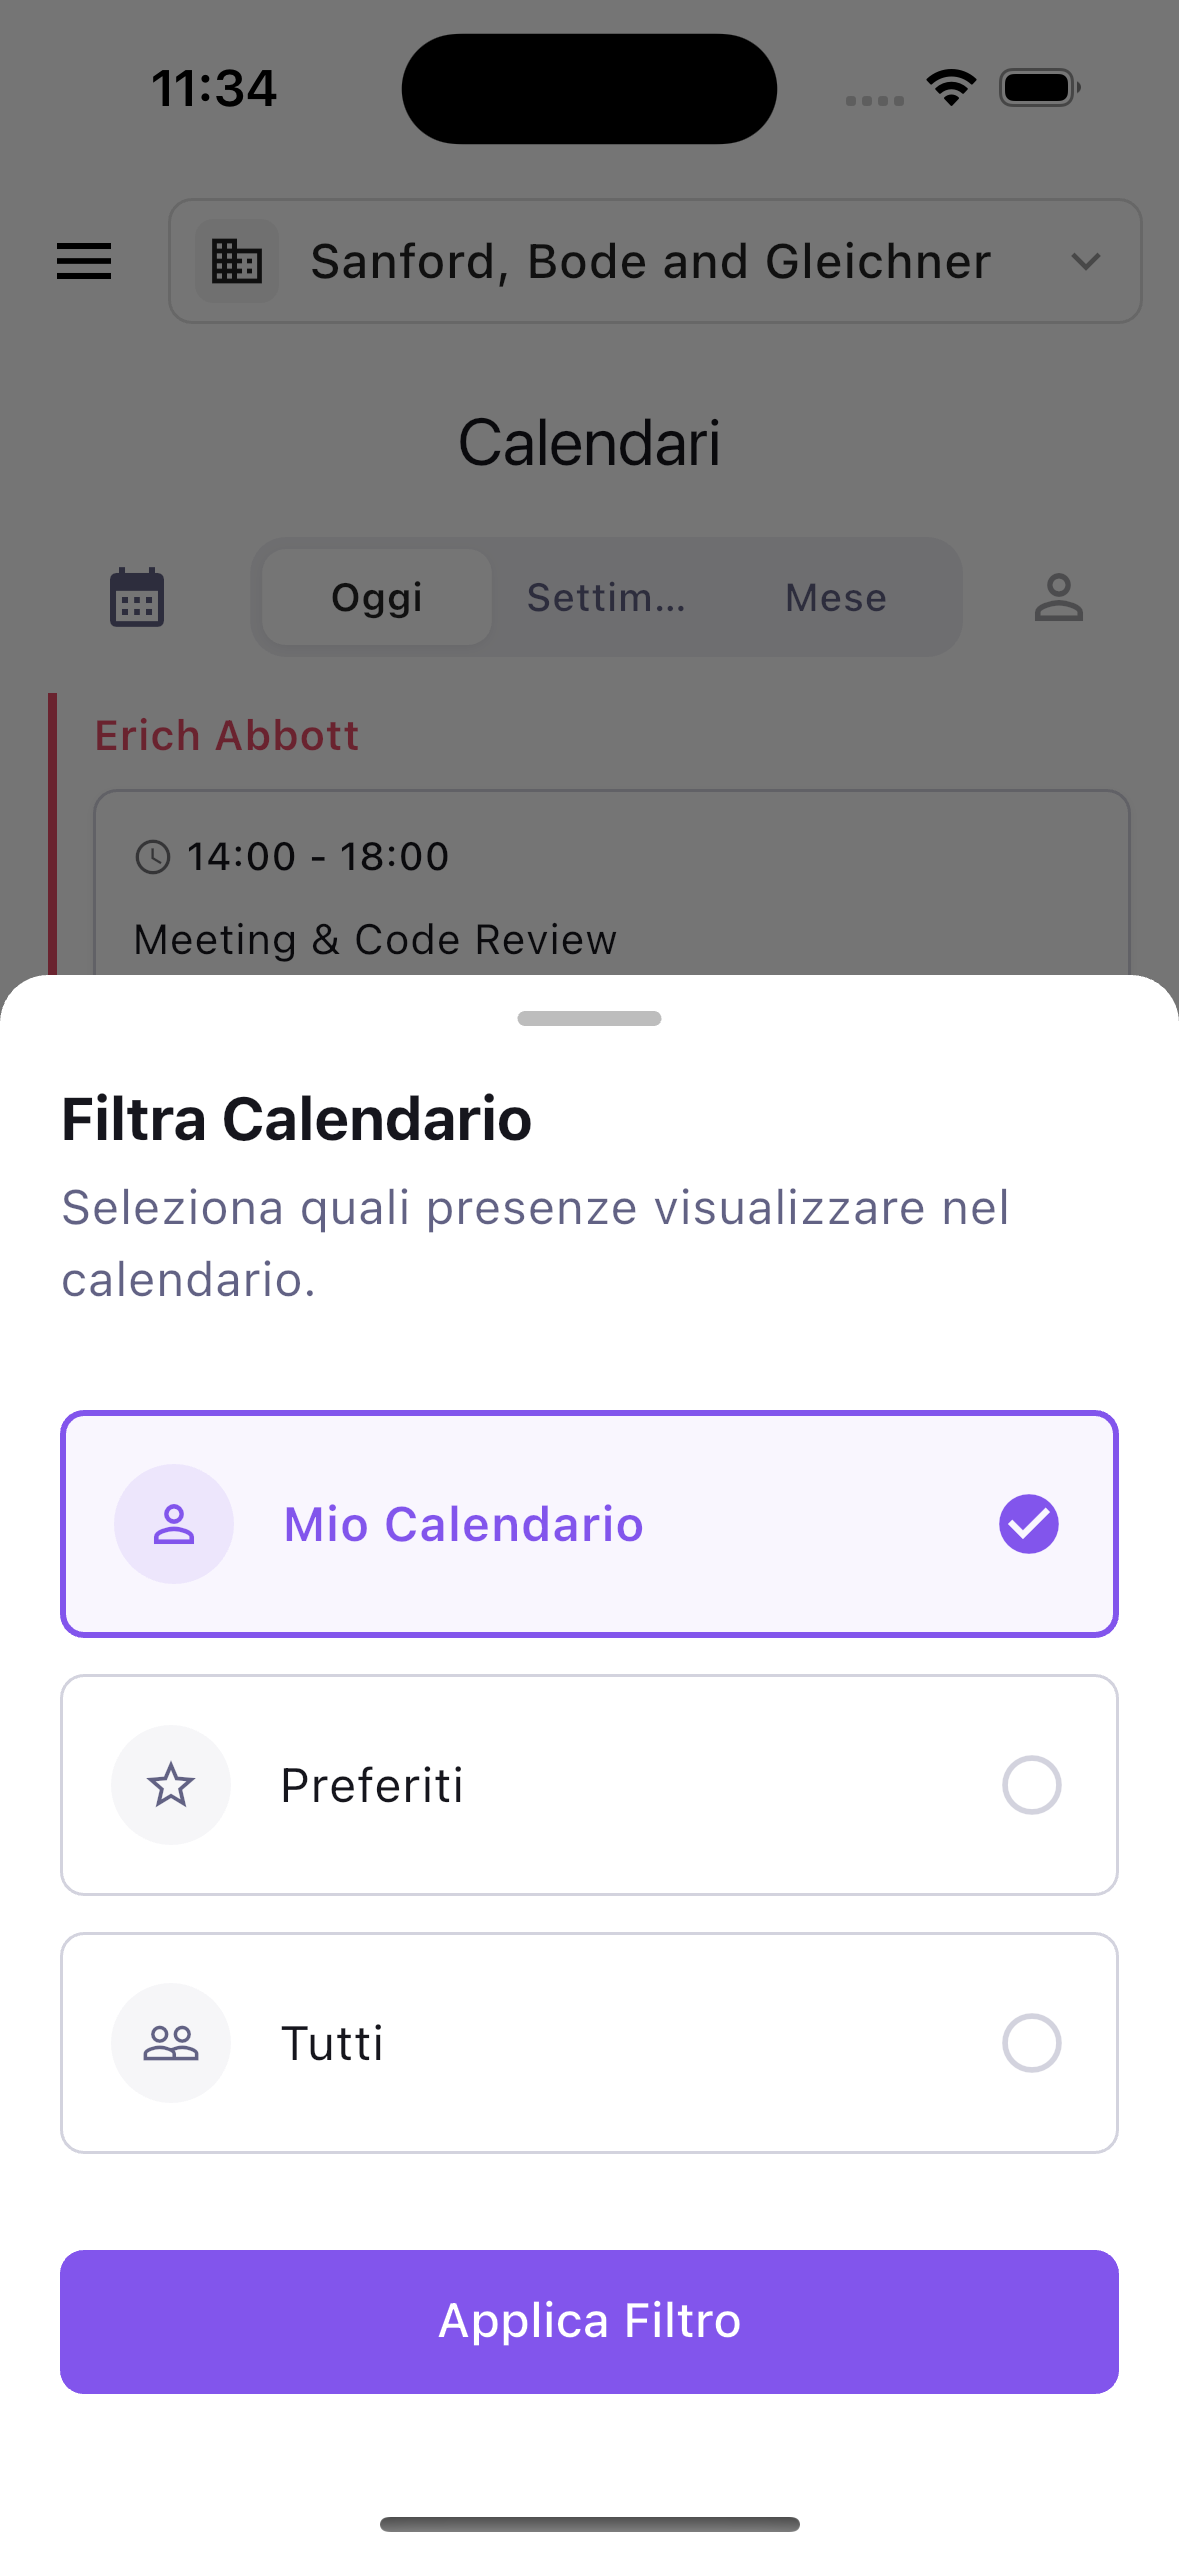
Calendar
The Calendar screen shows your time entries laid out visually as an agenda, organized by day.
What you will find
- Day, week, and month views — navigate between different time frames to get the level of detail you need.
- Color-coded entries — entries are colored by team member, making it easy to tell who is who at a glance.
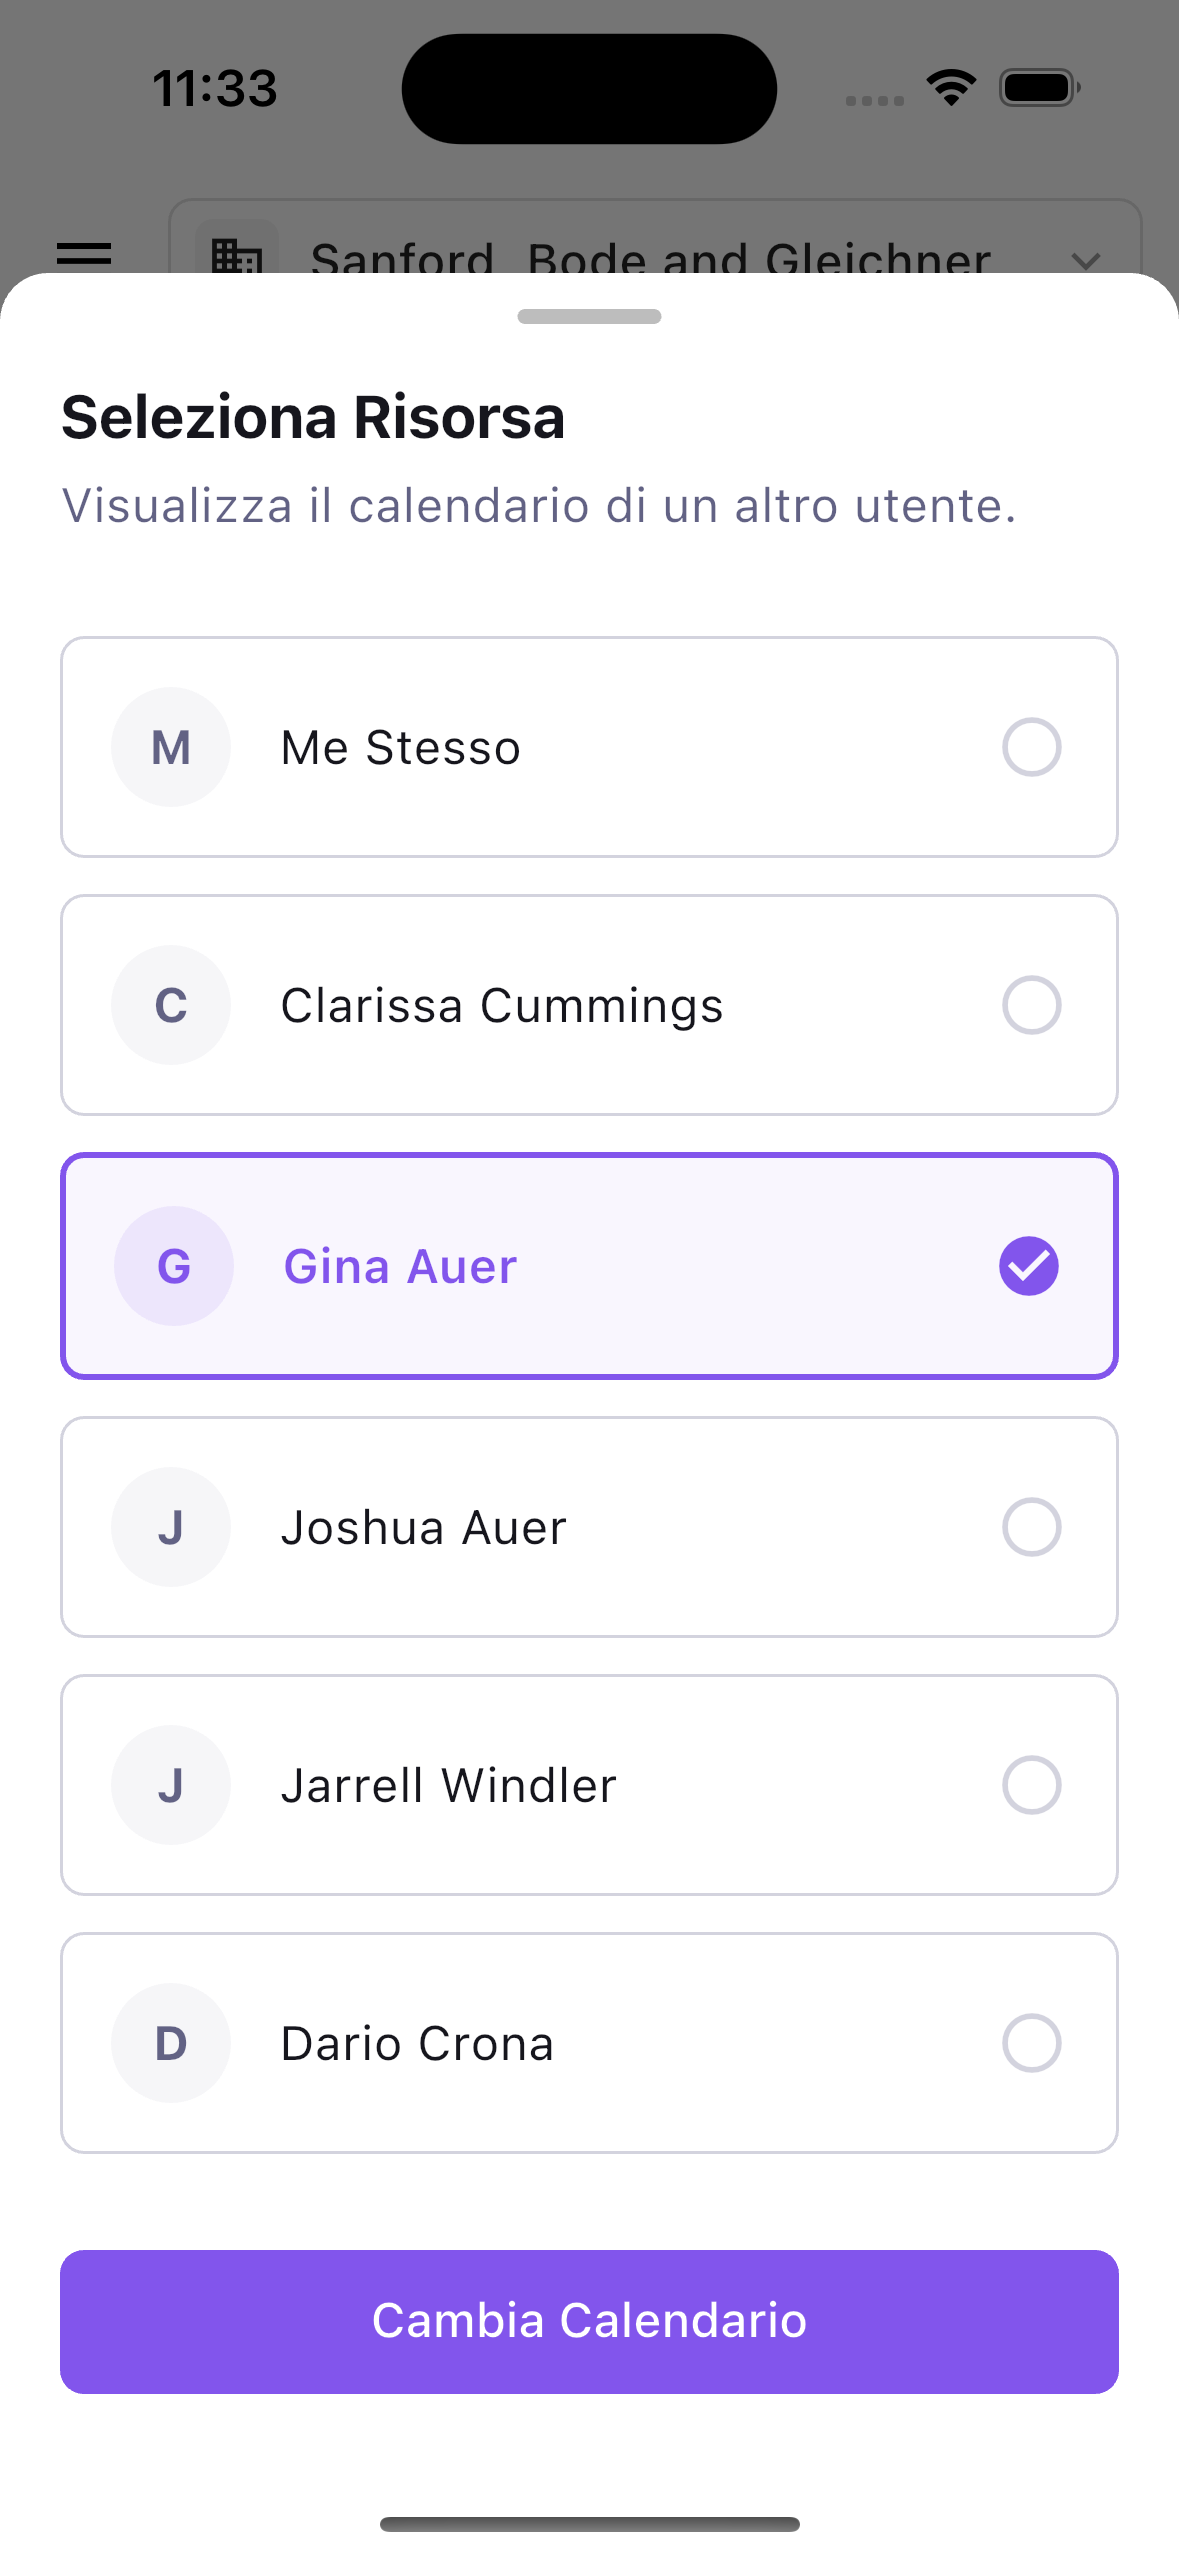
- Multi-resource view — if you are a supervisor or manager, you can see entries for multiple team members side by side, so you can check coverage and spot gaps.

What you can do
- Tap an entry to see its details and edit it (your own entries only).
- Create from calendar — tap a day to add a new entry for that specific date.
Hours report
The Hours report screen gives you a clear summary of your worked versus expected hours for any period.
What you will find
At the top, large summary numbers show your key metrics at a glance:
| Metric | What it tells you |
|---|---|
| Working Time | Total hours logged as presence |
| Absence Time | Total hours logged as leave or absence |
| Available Time | Total expected hours for the period |
| Remaining Time | Hours still unaccounted for (available minus working minus absence) |
| Presence Time | Net presence hours after adjustments |
Below the summary, a daily breakdown shows how your hours are distributed day by day, so you can spot days where time is missing or unbalanced.
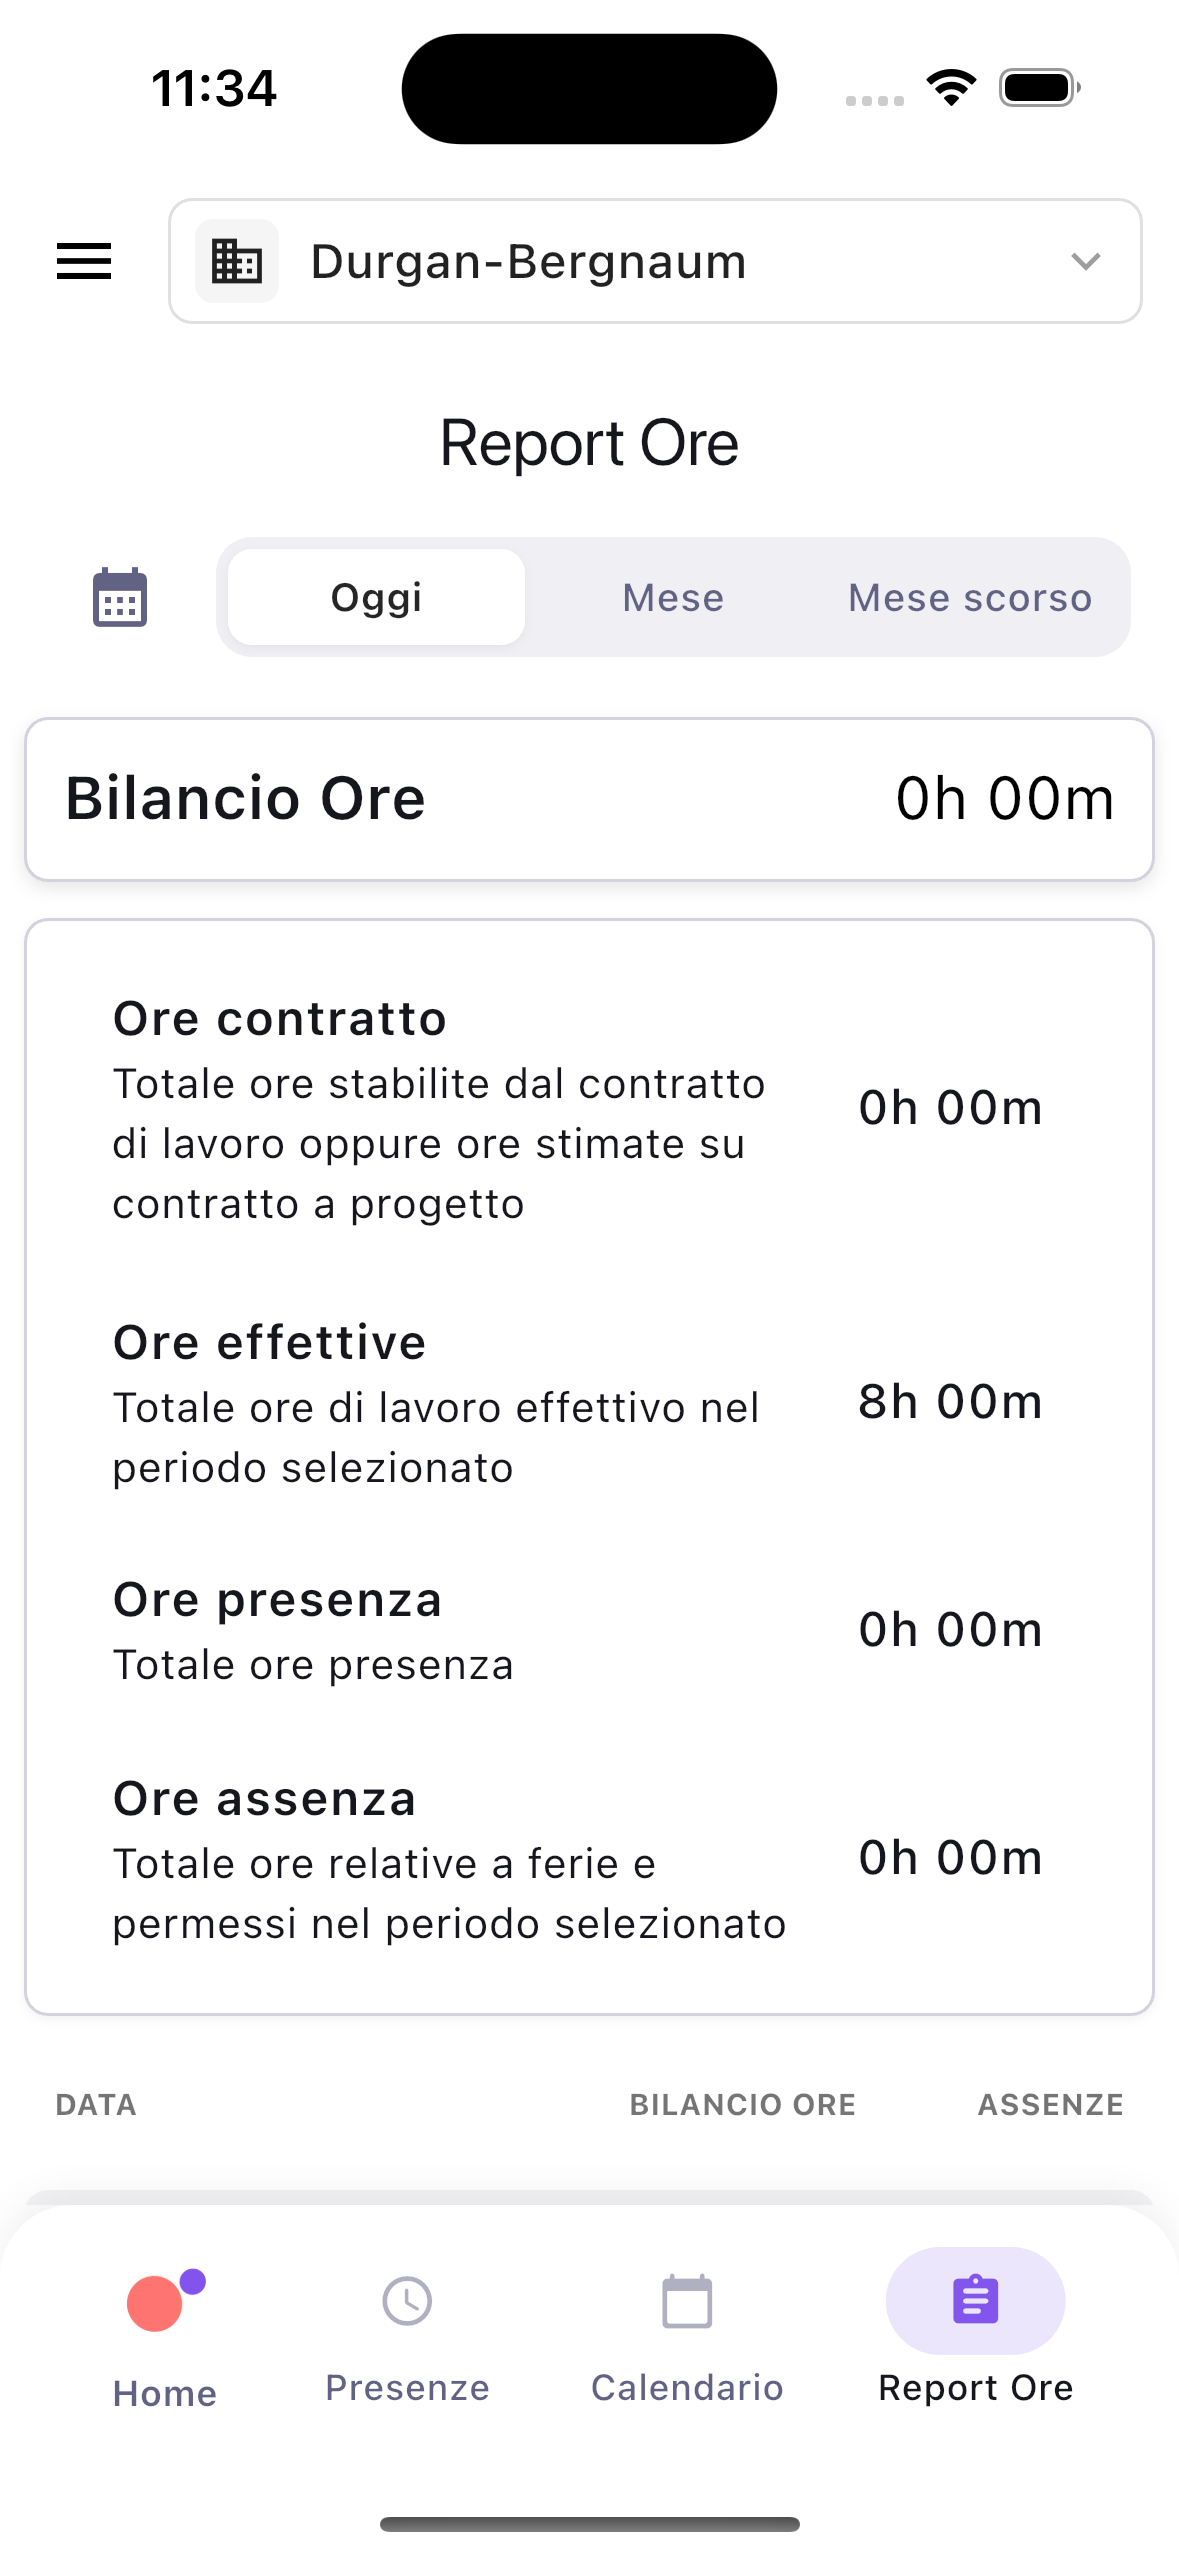
Filtering
- Quick filters — tap to switch between Today, Current Month, Last Month, or a custom date range.
- Per-resource view — managers can pull up reports for a specific team member instead of only their own.
Guides
Correction requests
Sometimes things go wrong — you forgot to clock in, your phone ran out of battery, or you left without scanning. The Correction requests screen lets you fix those situations.
What you will find
- Request form — select the correct date and time, then pick a reason: arrived early, left late, forgot to clock in, forgot to clock out, technical problem, or other.
- Submission confirmation — once submitted, your request is sent for review.
Correction requests create an auditable trail so your attendance records stay accurate and trustworthy.
Organization switcher
If you work for more than one company or branch, the app supports multiple organizations on a single account.
What you will find
- Organization name — always visible on the Home screen so you know which organization is currently active.
- Switcher — tap the organization name to see all the organizations you belong to and switch between them with a single tap.
- Automatic switching — when you scan a QR code or NFC tag that belongs to a different organization, the app switches you automatically. No manual action needed.
All data — timesheets, calendars, reports, timecards — is scoped to the selected organization. Switching organizations gives you a completely separate workspace.
Profile and settings
The Profile screen is where you manage your personal details and app preferences.
What you will find
- Display name and alias — update how your name appears in the app.
- Language — change the app language to match your preference.
- Timezone — set your timezone so entry times are recorded correctly.
Note:
When you first open the app after signing in, a short onboarding flow asks you to set up your name, alias, language, and timezone. You can change any of these later from the Profile screen.
Further reading
- Navigating the Timesheets interface — the full guide to the web application.
- Install the smartphone app
- Clocking in and out from the mobile app